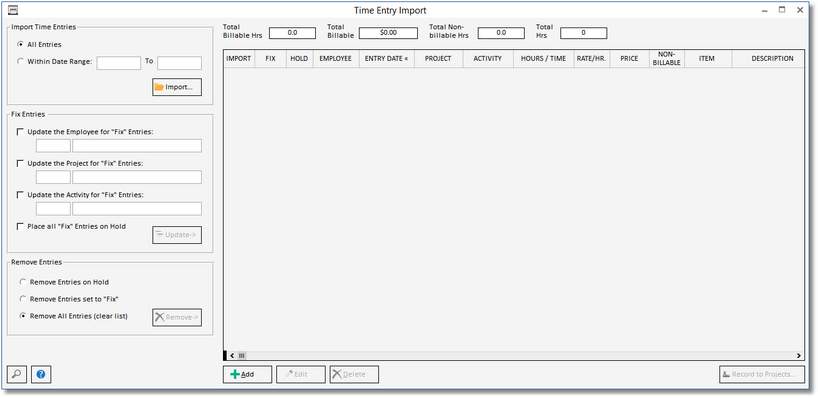
The Time Entry Import window allows a user to import a file from Excel, another program or a mobile phone app. The import will accept the following file types: xlsx, csv, txt, or ics.
Import Time Entries: Select whether to import all of the entries in your file, or for the import to only include time entries for a specific date range.
| • | All Entries |
| • | Within Date Range |
![]() Select the Import button to browse your computer and select the file you wish to import into Design Manager. You will need to link the fields from your file that match the fields in Design Manager. See Import Data (Time) for help linking your files.
Select the Import button to browse your computer and select the file you wish to import into Design Manager. You will need to link the fields from your file that match the fields in Design Manager. See Import Data (Time) for help linking your files.
Fix Entries: Once a file is imported, the entries that are tagged for Fix can be updated using the following options.
| • | Update the Employee for "Fix" Entries - Enter or Select an Employee code in which you wish to use to Fix the entries marked as Fix. |
| • | Update the Project for "Fix" Entries - Enter or Select a Project code in which you wish to use to Fix the entries marked as Fix. |
| • | Update the Activity for "Fix" Entries - Enter or Select an Activity code in which you wish to use to Fix the entries marked as Fix. |
| • | Place all "Fix" Entries on Hold - Select this option to move the entries marked as "Fix" to be on hold. |
Remove Entries:
| • | Remove Entries on Hold - This option will delete/remove all entries marked for "Hold". They will no longer be on the Time Entry Import window, nor in the Design Manager system any longer; they will be completely removed. |
| • | Remove Entries set to "Fix" - Selecting this option will delete/remove all entries marked for "Fix". They will no longer be on the Time Entry Import window, nor in the Design Manager system any longer; they will be completely removed. |
| • | Remove All Entries (clear list) - Selecting this option will delete/remove All Entries on the window. They will no longer be on the Time Entry Import window, nor in the Design Manager system any longer; they will be completely removed (if you have made a mistake with your import, selecting this option, will remove the imported entries, so that you may start again with a new import file.) |
![]() Select the Add button to add a new Time Entry manually (without importing a file). A new window will appear for you to create a new Time Entry. This window is similar to the Time Entry window from the Employee Time section of Design Manager, however, this entry will not create a Time Entry until the Record to Projects button is selected.
Select the Add button to add a new Time Entry manually (without importing a file). A new window will appear for you to create a new Time Entry. This window is similar to the Time Entry window from the Employee Time section of Design Manager, however, this entry will not create a Time Entry until the Record to Projects button is selected.
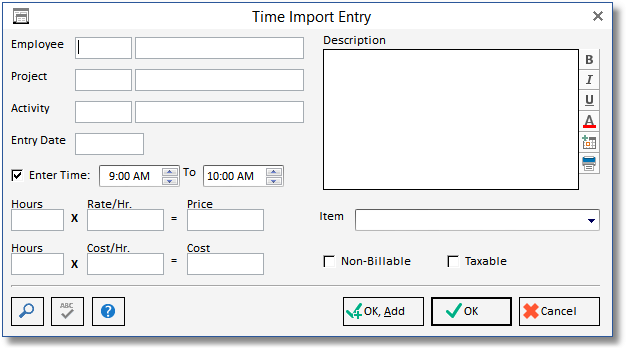
![]() To make a change to any of the entries on the main Time Entry Import window, select Edit. The window above will appear and you can change any fields of the entry as needed.
To make a change to any of the entries on the main Time Entry Import window, select Edit. The window above will appear and you can change any fields of the entry as needed.
![]() Selecting the Delete button will completely remove the highlighted entry from the Time Entry Import window.
Selecting the Delete button will completely remove the highlighted entry from the Time Entry Import window.
![]() Once you have entered all of the Time Entries and made any changes needed, you can now Record the entries marked for "Import" to their respect Projects. Any entries marked for "Fix" or "Hold" will not be recorded. You must first make the necessary changes to the entries so they may be marked as "Import" before they can be recorded.
Once you have entered all of the Time Entries and made any changes needed, you can now Record the entries marked for "Import" to their respect Projects. Any entries marked for "Fix" or "Hold" will not be recorded. You must first make the necessary changes to the entries so they may be marked as "Import" before they can be recorded.