A Task is an item that you create to track until its completion. Clicking the Add Task button or the Edit button while a task is highlighted on the Tasks and Appointments Grid of the To Do List Tasks and Appointments Window will display the To Do List Task Window.
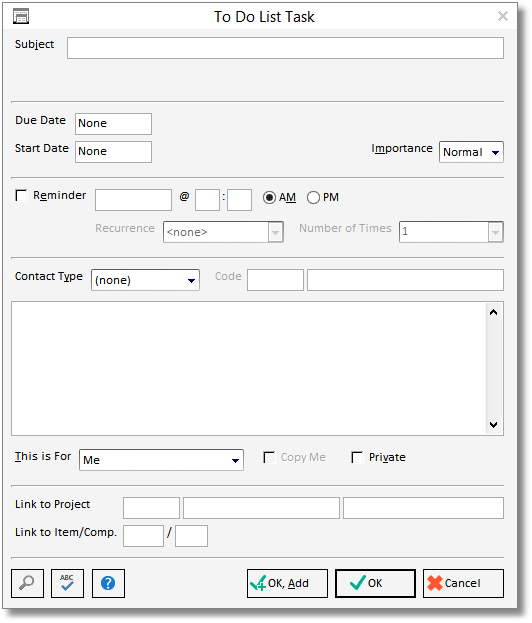
A Task consists of a Subject, which is used to enter the title or a summarized description of the Task, an optional Due Date, an optional Start Date, and an Importance level.
An Appointment occurs at a specific time and has a specific duration such as a meeting with a Client. Clicking the Add Appointment (Add App.) button or the Edit button while a task is highlighted on the Tasks and Appointments Grid of the To Do List Tasks and Appointments Window will display the To Do List Appointment Window.
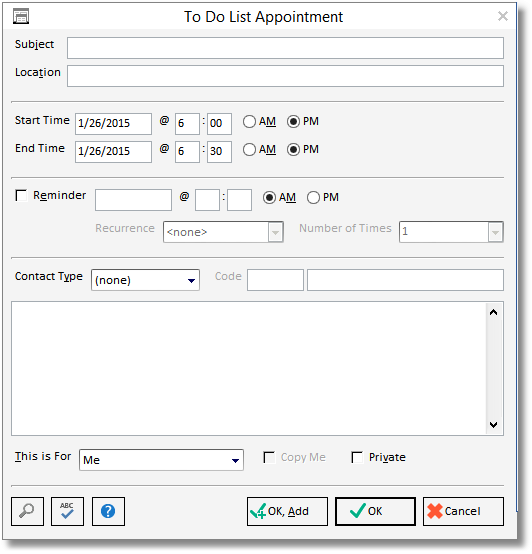
An Appointment consists of a Subject, which is used to entered the title or a summarized description of the Appointment and a Location to describe where the Appointment occurs. A Start Date/Time and an End Date/Time must be specified for an Appointment.
For both Tasks and Appointments, a Reminder can be set to notify the user of the Task/Appointment at a specified date and time. To create a Reminder, select the Reminder option and then specify a Date and Time for the Reminder. Reminders can also have a predefined Recurrence. The Recurrence has both a Duration and a Number of Times to repeat. The Duration menu has the following selections:
| • | <none> - The Reminder will be displayed a single time. Once it is closed by the user, no other Reminders will alert the user to the Task or Appointment. |
| • | Monthly - The Reminder will be displayed once per month on the same calendar day as the Reminder Date. For example, if the Reminder Date is 7/20/2010, the subsequent Reminders will be displayed on the 29th of the respective month. If the month contains less days than is necessary to schedule the Reminder (i.e., February with 28 days in the current example), the Reminder will be displayed on the last day of the month. |
| • | Yearly - The Reminder will be displayed once per year on the Reminder Date. |
| • | Weekly on <Day of Week> - This selection will always display the current day of the week in the Duration menu ("Weekly on Monday", for example). Selecting this option will display the Reminder once per week on the stated day. |
| • | Daily - The Reminder will be displayed once per day. |
The Number of Times indicates how many times the Reminder should reoccur. If Until Stopped is selected, the Reminder will continue to be displayed at the proper interval until the Task or Appointment is either marked as Complete or deleted. Selecting any of the numerical options will display the Reminder the selected number of instances. After the last Recurrence, the Reminder will no longer be displayed.
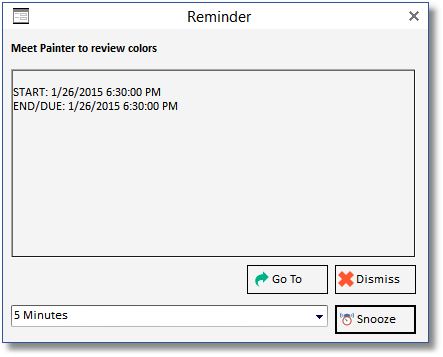
When a Reminder is displayed, information including the Task or Appointment Subject, Start and End Times, Start and Due Dates, Contact Information, etc. will be shown in the Reminder Information Pane. Clicking the Go To button will launch the To Do List Task or Appointment for review. Selecting Dismiss will close the Reminder until the next Recurrence if one has been configured. The Snooze button will close the Reminder but will display it again in the interval selected in the Snooze Interval Menu.
Note: When Design Manager is set to synchronize with Outlook then all Reminders will be handled by Outlook Design Manager will not display the Reminder. When the Outlook synchronization is not used, Design Manager will only display the Reminder if the software is running at the time that the Reminder occurs. Design Manager cannot display Reminders if it is not running! *Outlook sync is only available for Cloud users that also have CloudSpace.
Use the Contact Type selection to specify a Design Manager Contact to be associated with the Task/Appointment. Choosing a Contact Type allows the Contact Code be entered in the Code field. The Search button in the lower left can be used to select the proper Code of the Contact. Upon entering or selecting the Code, the Contact’s pertinent information will be copied into the appropriate fields of the To Do List Task or To Do List Appointment Windows. The information can then be modified to include additional notes, etc.
The This is For selection can be used to place the Task/Appointment on another Design Manager user's To Do List Tasks and Appointments Window if the user has the Create Tasks/Appointments of Others Password Attribute. A Task or Appointment can be sent to all users by using the Everyone option of the This is For menu. Note: Upon saving a Task or Appointment that is designated for another user, you may not have rights to make further edits or to delete the entry. When sending to Everyone, the Task/Appointment will need to be changed or deleted from each user’s list individually. When creating a Task or Appointment for other users, selecting the Copy Me option will create the same entry on your To Do List. When selecting Everyone in the This is For menu, the Copy Me option is automatically selected and disabled ensuring that the entry is created for yourself as well.
When the Private option is selected, only the current user will be able to see the Task/Appointment, then regardless of the all other user’s Task and Appointment Password Attributes. Should the Private option be selected when designating the Task/Appointment for another user, then only that user will be able to view it. Even the user who originally made the Task/Appointment can no longer edit or delete the entry.
The Link to Project and Link to Item/Component (Link to Item/Comp.) can be used to associate a Task or Appointment with a particular Component in a Project. When creating a Task in such a manner, it may be more convenient to create the Task from the Component Window - Tasks Tab.