ClientConnect – Front Page Tab
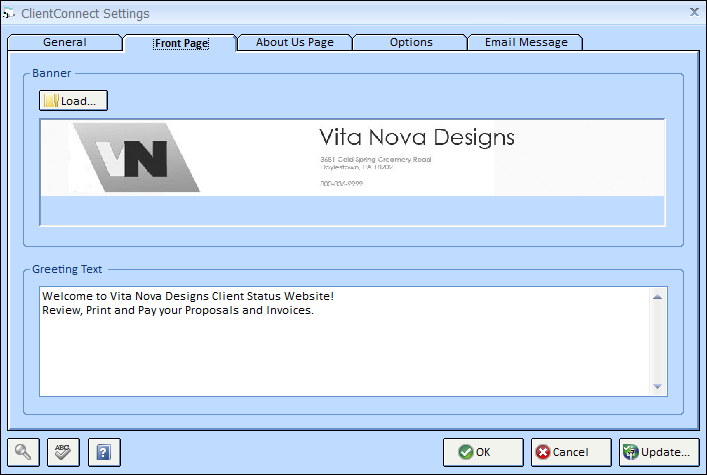
Banner – to Load a Banner into the program, choose the Load ![]() button. This will appear at the top of each page on your ClientConnect Website. *The optimal size/resolution for the Banner is 9.25 in width x 1.125 in height at 96 dpi.
button. This will appear at the top of each page on your ClientConnect Website. *The optimal size/resolution for the Banner is 9.25 in width x 1.125 in height at 96 dpi.
Example - Banner:

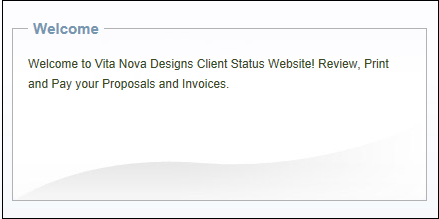
If you do NOT load your own banner you will see the Name from the ClientConnect Settings - General tab - Company Information.
Example - No Banner:

Upon choosing Load you will see the Design Manager - Load Picture Window from which you can locate and select the image from your computer/network that you would like to assign to the Item.
Save As: ![]() The Save As button allows you to store the Item's picture in a variety of formats on your hard drive, network, or removable media.
The Save As button allows you to store the Item's picture in a variety of formats on your hard drive, network, or removable media.
Picture Effects: Several controls are available for customizing the image. As these features alter the image, you'll notice that the original format will be stored in the Picture History in the right-hand corner of the window.
Brightness Bar: Clicking and "dragging" the Brightness bar to the left will reduce the overall image brightness. Conversely, dragging the Brightness Bar to the right will increase the overall brightness.
Smooth/Sharpen (S/S) Bar: Clicking and "dragging" the S/S bar to the left will reduce the sharpness of the image. Conversely, dragging the S/S Bar to the right will enhance the sharpness of the image.
Flip Button: ![]() Clicking the Flip button with vertically invert the image.
Clicking the Flip button with vertically invert the image.
Size Button: ![]() The Size button will launch the Resize Picture Window which allows you to set the dimensions of the image. Changing the dimensions of the image will NOT change the size of the picture on the Proposal documents. These are fixed and cannot be altered manually. Therefore, it is only useful to resize the image to smaller dimensions in order to save disk space on your computer and allow Design Manager to process the image faster when printing.
The Size button will launch the Resize Picture Window which allows you to set the dimensions of the image. Changing the dimensions of the image will NOT change the size of the picture on the Proposal documents. These are fixed and cannot be altered manually. Therefore, it is only useful to resize the image to smaller dimensions in order to save disk space on your computer and allow Design Manager to process the image faster when printing.
Remove Button: ![]() The Remove button will delete the associated image from the Item. Note that the using the Remove button will NOT delete the original image if it was loaded into the Item from your hard drive or network location.
The Remove button will delete the associated image from the Item. Note that the using the Remove button will NOT delete the original image if it was loaded into the Item from your hard drive or network location.
Cut Button: ![]() Choosing the Cut button removes the image. The image is placed in the history below and on your Computer's Clipboard.
Choosing the Cut button removes the image. The image is placed in the history below and on your Computer's Clipboard.
Copy Button: ![]() The Copy button allows you to keep the image in place and copies the Image into the memory of your Computer's Clipboard.
The Copy button allows you to keep the image in place and copies the Image into the memory of your Computer's Clipboard.
Paste Button: ![]() Clicking on the Paste button will bring in any image you have placed on your Computer's Clipboard; Making it easier to bring in a picture that you do not have saved to the computer.
Clicking on the Paste button will bring in any image you have placed on your Computer's Clipboard; Making it easier to bring in a picture that you do not have saved to the computer.
Undo Button: ![]() Clicking the Undo button will replace the current image with the most recent image in the Picture History. The Picture History is only available while currently adding or editing the image. Upon saving or canceling the Item, the History is lost.
Clicking the Undo button will replace the current image with the most recent image in the Picture History. The Picture History is only available while currently adding or editing the image. Upon saving or canceling the Item, the History is lost.
Greeting Text - Enter any text here for the Website User to see inside the Welcome Section of the ClientConnect Website. This field can fit approximately 8 lines of 50 characters each.