Before adding an Item to a Project, you may find it convenient to first add a Location under which the Item will be placed. A Location is a logical association of Items and Components within a Project. A Location can be a physical locale such as a bedroom or living room or a more abstract concept such as consulting or travel expenses. Items are organized by Location on Proposals, Invoices, and many management reports in Design Manager. Design Manager has two Location Glossaries you may choose from, a Company-wide list or a separate list for each Project. Use the Company-wide Location Glossary to enter a master list of Locations that can be used to import Locations into any Project as desired. Use the Project-specific list to enter Locations unique to a particular Project.
You can create a Location for a Project in two ways. First, highlight the Project and click the New Location ![]() button on the Projects and Specifications Window which will display the Location Window. You can also right-click the Project and select New è Location.
button on the Projects and Specifications Window which will display the Location Window. You can also right-click the Project and select New è Location.
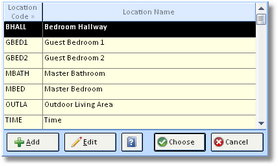
To choose a Location from the Company-wide list, click on “Choose from Glossary”. Doing so will display the Company-wide Location Glossary. To import the desired Location, select it from the Location Glossary and click the Choose button.
To create a Location for the Project-specific list, select “This Project Only” which displays the Location Window.
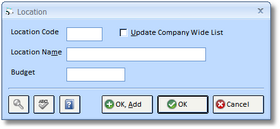
Enter a unique Code which may be up to 5 alphanumeric characters. The Location Name is used to describe the Location and can up to 30 characters. As an example, you may want a Location for the client's living room. In such a case, "LVGRM" could be used as the Code while "Living Room" would be the Location Name.
Budget: An optional field for you to enter this Location's total budget amount. This number will appear on the Budget Report.
Click OK to save the new Location.
After importing the Location from the Company-wide list or creating a new Project-specific listing, the Location will now appear beneath your Project.
To add a Location to the Company-wide list, click on the Add button on the Location Glossary Window or select the Update Company Wide List check box upon creation of the new Location.