The Time Keeping Window is used to create, review, edit, and delete Time Entries within Design Manager.
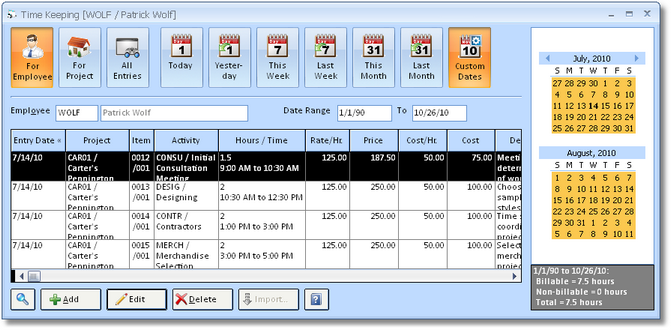
The Time Keeping Window allows you to easily review Time Entries based upon which Time Entries Selection buttons along the top of the window are selected. The buttons are as follows:
Time Entry Selection: The Time Entry Selection buttons allow you to narrow the Time Entries displayed by either Project or Employee.
 For Employee: Select the For Employee button to input an Employee Code to only display Time Entries for that Employee regardless of the Project for which the Time Entry was created. Use the Search button in the lower left corner of the window to select a Project on the Employee / Manager/ Salesperson Search Window.
 For Project: Select the For Project button to input a Project Code to only display Time Entries for that Project regardless of the Employee associated with the Time Entry. Use the Search button in the lower left corner of the window to select a Project on the Project Search Window.
 All Entries: Use the All Entries button when you don't want to view Time Entries for only a single Project or Employee.
Date Selection: Use the Date Selection buttons to quickly select Time Entries for a certain period of time. Clicking one of the Date Selection buttons configures the Date Range automatically in order to display the Time Entries within the desired time period.
 Today: Click the Today button to only show Time Entries with the current date as the Entry Date.
 Yesterday: Click the Yesterday button to only show Time Entries with the previous date as the Entry Date.
 This Week: The This Week button will list Time Entries with an Entry Date within the current calendar week, not the last seven days. For example, if today is Tuesday, November 9th, 2010, clicking the This Week button will show Time Entries dated from Sunday, November 7th through Saturday, November 13th.
 Last Week: The Last Week button will list Time Entries with an Entry Date within the previous calendar week. For example, if today is Tuesday, November 9th, 2010, clicking the This Week button will show Time Entries dated from Sunday, October 31st through Saturday, November 6th.
 This Month: Click the This Month button to list Time Entries with an Entry Date within the current calendar month. For example, if today is Tuesday, November 9th, 2010, clicking the This Month button will show Time Entries dated from Monday, November 1st through Tuesday, November 30th.
 Last Month: Click the Last Month button to list Time Entries with an Entry Date within the previous calendar month. For example, if today is Tuesday, November 9th, 2010, clicking the Last Month button will show Time Entries dated from Friday, October 1st through Sunday, October 31st.
 Custom Dates: The Custom Dates button allows you to manually enter the desired starting and ending date into the Date Range to displayed Time Entries with an Entry Date within that period.
You can use a combination of the Time Entry Selection and Date Selection buttons to precisely define the Time Entries you want displayed.
To the right of the Time Entries Grid is the Time Entry Calendar.

When you click a Date Selection button, you'll notice that the dates that correspond to the Date Selection button will be highlighted in orange. For example, clicking the This Week button will highlight all dates within the current calendar week. Similarly, you can use the Time Entry Calendar to view Time Entries within a selected time period. You can simply click on a particular date or select several contiguous dates by holding down the mouse button and "dragging" the cursor over the range of dates. Doing so will automatically select the Custom Dates button and fill in the proper starting and ending dates into the Date Range.
Beneath the Time Entry Calendar, the Time Keeping Hours Summary panel is displayed.
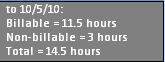
The Hours Summary Panel lists the Date Range, Total Billable Hours, Total Non-billable Hours, and Total Hours for the current Date Range.
The Add, Edit, and Delete buttons are used to create, modify, and remove Time Entries, respectively. Adding Time Entries is discussed in detail under Recording Time Billing Entries.
To edit an existing Time Entry, highlight the entry on the grid and click on the Edit button. You may also edit the entry from the Projects and Specifications Window.
You can permanently remove a Time Entry by clicking the Delete button. Some Time Entries cannot be deleted. For example, you will not be able to delete a Time Entry that has been included on a Client Invoice.