The Balance Sheet Layout Window is accessed through the Balance Sheet Report. Here the order in which the Accounts print on the Balance Sheet may be changed as desired. However, Accounts may not be removed out of their respective Account Type (i.e., 10010 – Cash Checking Account may not be moved from the Assets folder to the Liabilities or Equity folder).
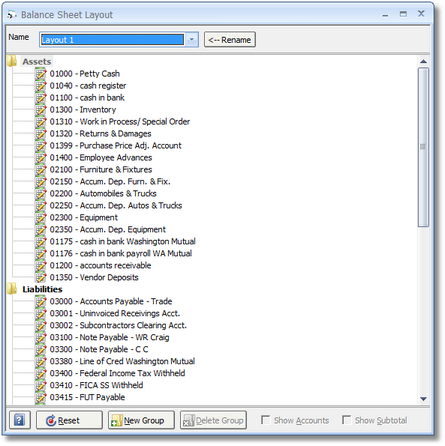
To move an Account to another location, drag-and-drop the Account to the new location. The New Group button will add a "subgroup" under any of the three existing Account Types - Assets, Liabilities, and Equity. The new Group can be entitled as desired by the user. To move an Account into a Group, drag the Account and drop it into the Group folder. To have a total of all Accounts in the Group be displayed on the Balance Sheet, select the Show Subtotal option. If the Accounts within the Group should continue to be displayed on the Balance Sheet, be sure that the Show Accounts option is selected. If the Show Accounts option is not selected, the Show Subtotal option will automatically be selected and disabled so that a single entry for the Group representing the total of the Accounts will be shown on the report. If each Account has been removed from the Group, a Group can be removed by clicking the Delete button.
The best method for changing the layout is to experiment by making small changes and then print the Balance Sheet to view the results. Clicking on the Reset button will return all Accounts to being displayed in Account Number order and will remove all Groups and totals.