The Invoice Tab is the fourth tab on the Company Advanced Options Window and displays settings regarding the manner in which Client Invoices will print. The information entered here will become the default settings for any new Projects created and can be overridden or altered as desired.

Title: The titles for each of the Component Types, excluding Merchandise can be changed in this field. The new title will only appear on Invoices. This is an optional field, but must be filled in if the style is set to "List" or "Total". The new title entered here will only appear on NEW Project Invoices. To change an Existing Project Title, see Project Advanced Options Window - Invoice Tab.
Style: There are four styles from which to choose for each Component Type - for Examples go here:
Combine: Adds the amount for this Component Type into the price of the corresponding Item. For example, if you invoice two Items that are $100.00 each, and each have $50.00 Freight, then the price next to each Item will be $150.00 in the body of the Invoice. The title is not used for this style.
List: Shows the amount for this Component Type below the Item in the body of the Invoice. The title will print next to the amount.
Total: Prints the total amount for all Items for the corresponding Component Type in the footer of the Invoice. For example, if you invoice two Items that each have $50.00 Freight, the computer will display Freight $100.00" in the total section of the document.
Ignore: Will not show or include the amount of this Component Type anywhere on the Invoice.
Pricing: Pricing options can be changed for each of the six Component Types. These options control how Design Manager determines the invoice price to the client. The following options may be selected:
Always Proposal: This option will cause the invoicing system to charge the estimated price for the corresponding Component Type to the client.
Always Actual: The Always Actual option will cause the invoicing system to markup the costs recorded on Vendor Invoices. If this option is used, the client should not be invoiced until all of the Vendor Invoices have been received and entered into Design Manager. For example, if you are buying a chair for $100.00 and you are marking it up by 50%, then the Proposal price will be $150.00. If when the Vendor Invoice comes in, the chair actually costs $90.00, this option will cause the invoicing system to pass the savings onto the client by charging $135.00.
Automatic: This option charges the higher price of the Always Proposal or Always Actual options to insure you are maximizing your profit.
Suppress Location Heading (Sup. Loc. Heading): Check this option if you do not want room Location headings and subtotals to appear on Invoices.
Suppress Unit Prices (Sup. Unit Prices): Check this option if you do not want unit prices for Items to appear on Invoices.
Show Ship To Address (Show Ship To Addr.): Check this option if you want the Project’s default ship to address to print on Invoices.
Show Site Address (Show Site Addr.): Check this option if you would like the Project’s site address to appear on Invoices.
Show Project Code (Show Proj. Code): Check this option if you want the Project code to print on Invoices.
Unit to 3 Decimals: This option will print the unit price to 3 decimal places to avoid rounding issues with unit prices. For example: 3 for $1.00 = .33 * 3 = .99 or .333 * 3 = $1.00
Remarks on New Page (Rmks. on New Pg.): Check this option if you would like the Invoice remarks to appear on a separate page. If this option is not selected, the remarks will appear at the bottom of the Invoice. If you elect not to show remarks on a separate page, it is a good idea to keep them brief so that Design Manager can more easily fit them in the allocated space.
Single Item Invoice (Single Item Inv.): When the Single Item Invoice option is selected, one Client Invoice will be generated for each Item tagged on the New Invoice Window, with a separate Invoice number will be assigned to each Item invoiced.
Time Supplement: This option will print an additional page after the main Client Invoice listing all time charges that were included on the Invoice. It will show the details of the Entry Date, Employee, Reference No, Description, Hours and Rate. This feature is only available with the optional Time Billing module.
Show:
Time Details: This prints similar information as the Time Supplement, but within the body of the actual Invoice. The time charges for each Item will be listed in detail beneath each Item. This feature is only available with the optional Time Billing module.
SE Times: This option will print the Start and End Times from the entered Employee Time onto your Time Invoice.
For Examples of these different Time Invoice options, see Recording Time Billing Entries and the Time Entry Window.
Email: Prints the E-mail Address from inside the Company Settings - E-mail field. The e-mail address will appear underneath the Company Info printed at the top left of the Invoice.
Website: Prints the Website Address from the Company Settings - Website field. The website will appear underneath the Company Info printed at the top left of the Invoice.
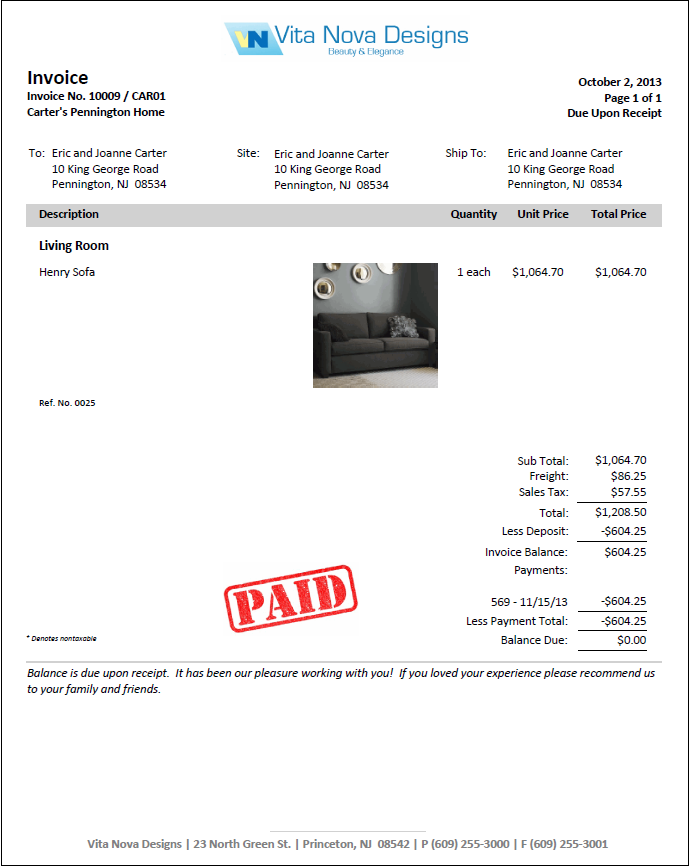
Paid Stamp: When an invoice is reprinted that has a Balance Due of $0, this option will show a PAID stamp on it in red. See Example below. ***This is an overall Company Option only.***
Remarks: Type any remarks that you would like to appear on Invoices into this field. To search for commonly used remarks, click on the Search Button in the lower left corner of the window. These remarks can be overridden for each Invoice created.
Example of an Invoice - Modern Style - showing the PAID stamp: