The second tab on the Project Window is the Defaults Tab. Much of the information entered here will be applied to each new Item and Component created within the Project. To change the default information once an Item has been entered, you must change the information for each Item on the Item or Component Windows. When a new Project is created, some of this information is defaulted from the Company Advanced Options – General Tab.
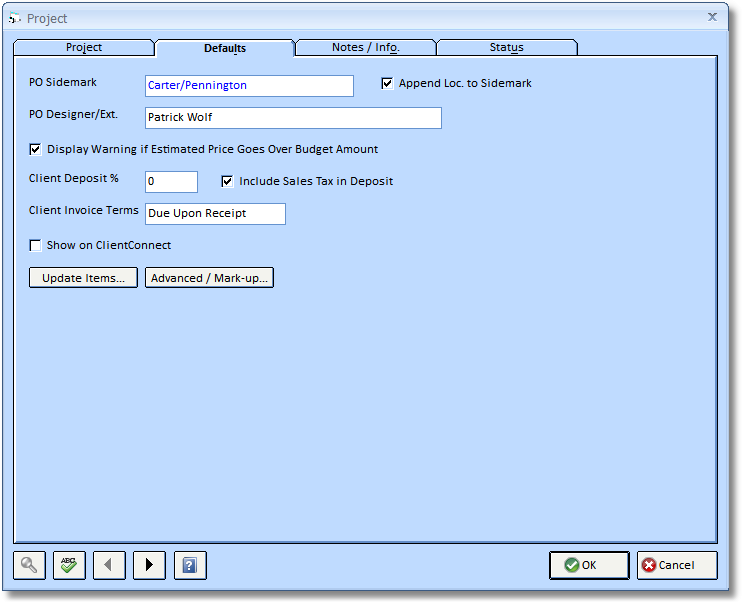
PO Sidemark: Enter a sidemark that will print on the Purchase Orders for a Project. The PO Sidemark is a default value which will be used for every new Component defined for a Project. To change the Sidemark for a particular Component, you must do so when entering that Component on the Component Window – Special Instructions Tab. This field can hold up to 60 characters.
Append Location to Sidemark: Selecting this option will tell Design Manager to append the Location name, such as Living Room, to the Sidemark for each Component. For example, if the Sidemark field is "SMIT1/John Smith" and this option is checked, then the Component’s Sidemark might be "SMIT1/John Smith/Living Room" if the Item is in the "Living Room" Location.
Designer / Extension: Enter the designer or contact name and phone extension for the Vendor to use for inquiries concerning an order (ex. "Jennifer, Ext. 12"). This field will print on the Purchase Orders, and can be overridden before printing each Purchase Order.
Display Warning if Estimated Price Goes Over Budget Amount: Selecting this check box will tell the system to display a warning when you select OK upon saving an Item with an Estimated Price that will make either the Item, Location or the Total Project Budget extend above the limit/budget amount entered. You will be able to continue to enter the Item and its Estimated Price into the system. This is only a warning message, you will be able to continue to enter the Item.
Client Deposit %: Enter the percent of deposit that you require from the Client before you proceed with purchasing. This percent is a default value than can be adjusted on an Item-by-Item basis. Enter the percent as a whole number (ex. enter "10" for 10%, not ".10"). Do not type in the percent sign.
Include Sales Tax in Deposit: Checking this option tells Design Manager to include the sales tax in the calculated deposit amount for Items in the Project. For example, an Item for a Project is $100.00 and you require a 50% deposit. The Item requires charging 6% sales tax. When this option is selected, the deposit required from the Client would be $53.00 (one half of $100.00 plus one half of $6.00 dollars tax). If this option was not checked, the deposit required would be $50.00.
Client Invoice Terms: The Client Invoice Terms will print on any Invoices issued for the Project. Examples of terms include "Net Due Upon Receipt" and "Net Due in 30 Days". This field will hold up to 30 characters.
Show on ClientConnect: This is an Optional module. If you have the Client connect module you can select this checkbox to default the Project to Show on the ClientConnect Website. When deselected this Project will not appear available for your Client Website User.
Update Items Button: This button is only available when editing a Project. Clicking on this button will open the Update Items Window where you may change multiple Items in a Project based on new defaults. For more information, see Update Items Window under Additional Features.
Advanced/Mark-up Button: Clicking on this button will open the Project Advanced Options Window. Here many more Project defaults can be set for accounting, printing documents, as well as Project defaults for tax, markup, discount, etc. For a full explanation of these defaults, see Project Advanced Options Window under Additional Features.