Upon completing a treatment, you can transfer the treatment to the Project by clicking the OK button.
Upon doing so, you will be asked "Are you sure that you would like to create this Item in the Project?". Clicking Yes will transfer the treatment to the Project and close the Quick Quote Window. Selecting No will return you to the Quick Quote Window.
By default, upon transferring the treatment, Design Manager will create a single Item in the Project for the treatment. The Item will be comprised of one Component for each treatment Component. Such a structure allows you to have the treatment appear as a single entry on the Proposal (Quote) and Invoice to the Client but allows Purchase Orders to be sent to a multitude of different Vendors for the necessary fabric, hardware, etc. Further, the treatment maps ideally to Design Manager’s Workroom system in that the Item represents the finished product that the workroom is to produce and each Component represents the materials and labor required to construct the treatment.
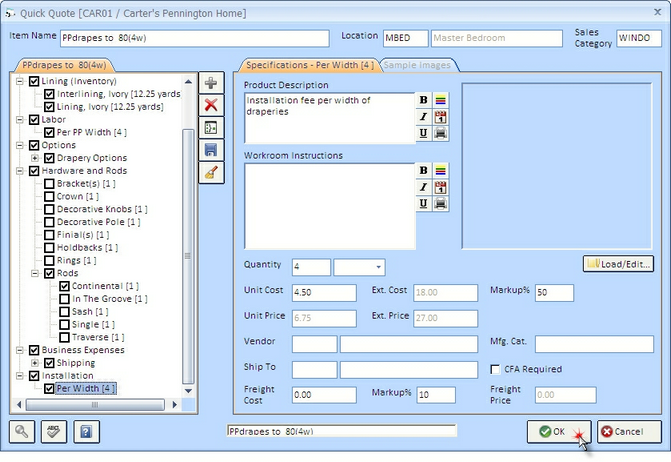
For a simple treatment, the information displayed on the Specifications - <Treatment Name> Tab of the Quick Quote Window is transferred to a single Item within the Project. The Product Description will be displayed in the Client Description of the Item Window - Item Tab along with the Quantity, Sales Category, and Location. The image displayed on the Specifications - <Treatment Name> Tab will be loaded into the Item Window - Picture Tab so that it can be optionally shown on the Proposals (Quotes) and Invoices to the Client. The picture will also be displayed in the header of the Work Order document for the workroom. The Workroom Instructions, Workroom Vendor, and Ship To will all be transferred to the Item Window - Workroom Tab.
Each selected option within a treatment will be represented by an individual Component within the main Item. The Product Description will be displayed in the PO Description of the Component Window - Component Tab along with the Quantity, Markup %, Unit and Extended Costs, and Unit and Extended Prices. The Vendor and Ship To will also be displayed in the corresponding Component Window fields. If a Freight Cost was entered on the Quick Quote Window for the option (i.e., freight for a particular fabric), it will be displayed as an Additional Charge Freight Component at the bottom of the Component Window. The Quick Quote Workroom Instructions will be shown in the Workroom Special Instructions on the Component Window - Special Instructions Tab. If the CFA Required selection was checked on the Quick Quote Window, it will be indicated here as well. The image displayed on the Quick Quote tab will be loaded into the Component Window - Picture Tab so that it can be displayed on the Purchase Order to the Vendor and the Work Order to the workroom.
The above describes the default transfer mechanism of one Item with multiple Components. You can, however, have Design Manager create one Item for each Component of the treatment by selecting the Create a Separate Line Item for each Treatment Component option on the Company Information Window - Quick Quote Tab, if your Client wants the treatment fully itemized on the Proposal and Invoice.
After transfering, you can proceed in creating a Proposal (Quote/Estimate), Work Order, all Purchase Orders, and eventually the Invoice for the treatment in the normal Design Manager fashion!