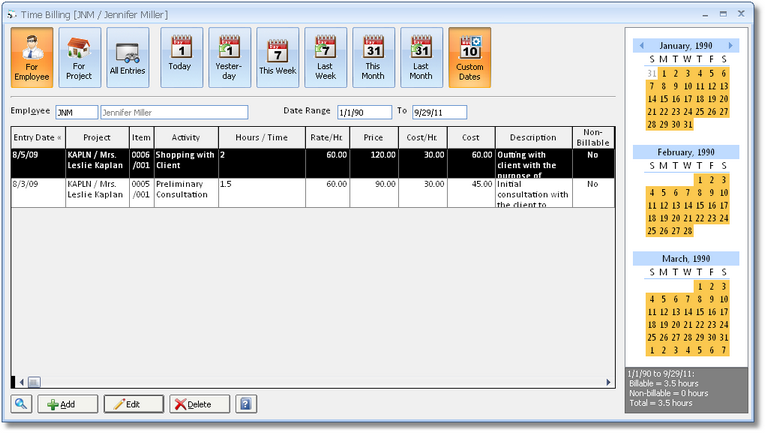
First, select whether you want to record Time Entries by Employee or Project by clicking the For Employee or For Project buttons, respectively, on the Time Keeping Window. Then, input the desired Employee or Project Code into the appropriate field. To search for an Employee or Project, click on the Search button in the lower left corner of the window.
To add a Time Entry, click on the Add button. This will open the Time Entry Window.

If you are entering by Employee, you will first enter the Project Code for which the Employee has recorded the time. Upon entering the Project Code, the Location and Sales Category Codes will default from the corresponding fields on the Project Advanced Options Window - Time Tab, if they have been entered. Remember, a Location is often a physical locale such as a bedroom or living room but can be a more abstract concept such as billable time for consultation with the client, CAD Drawings, etc. The Sales Category will determine the desired General Ledger Revenue Account that will be affected upon invoicing the Time Entry to the client. For more information, see Entering Locations and Understanding Sales Categories.
If you are entering by Project, you will enter the Employee Code who has recorded the time. Otherwise, you will proceed exactly as if you are entering by Employee.
The Entry Date will default from starting date of the Date Range on the Time Keeping Window but can, of course, be changed as necessary. Next, input the Code of the Time Activity that has been performed. To search for a Time Activity, click on the Search button in the lower left corner of the window. If you need to create a new Time Activity, you may do so from the Time Activity Glossary Window. Click on the Choose button once you have chosen an Activity from the Glossary and you will return to the Time Entry Window. The Description for the Time Activity will now be displayed.
The Rate and Cost will be determined by the combination of the selected Project, Employee, and Time Activity which is discussed at length under Defining Employee and Project Time Billing Rate and Cost Defaults.
The Enter Time selections can be used to automatically calculate the Hours worked. Click the Enter Time option and input the starting and ending times for the task. The arrow keys can be used to increase or decrease the hours, minutes, and AM/PM selection by clicking on the appropriate portion of the time and clicking the up arrow to increase and the down arrow to decrease.
You may select to enter the Time Entry as a New Item in the Project or you may choose to Join to Existing Item. If you choose to join the Time Entry to an existing Item, then you will need to enter the Item Reference Number into the corresponding field. You may search for the Reference Number by clicking on the Search button.
The Taxable setting for the Time Entry will default from the Taxable option for Time on the Project Advanced Options Window - General Tab. Time Entries can be designated as Non-billable so that you can accurately track labor cost, overhead, etc. for a Project even if the cost will not be billed to the Client.
When all of the information appears correct, click OK. The new Time Entry will appear on the Time Keeping Window. The Time Entry will also appear on the Specifications Window for the Project.
To see Examples of a Time Invoice, see New Invoice Window - Invoice Tab.