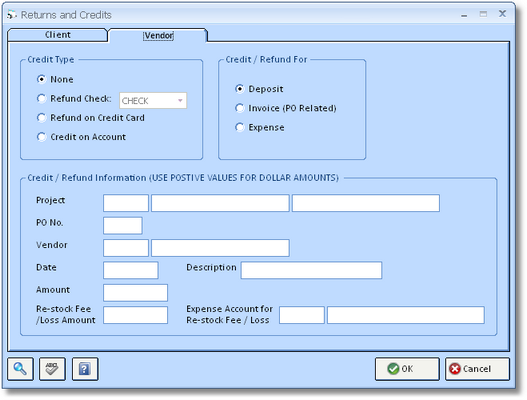
The Vendor tab of the Returns and Credits Window is shown below and assists you in processing refunds and credits under a variety of scenarios.
Depending on the combination of the "Credit Type" and "Credit / Refunds For" selections, various transactions will be created in Design Manager to process the refund or credit from your Vendor. The following combinations, and the relevant transactions, are available:
Refund Check:
| • | Refund Check and Deposit: A negative Deposit for the desired amount is applied to the Purchase Order. A Miscellaneous Cash Receipt will be recorded for the refund amount less any restocking or loss amounts. |
| • | Refund Check and Invoice (PO Related): A negative Vendor Invoice for the desired amount is recorded on the Purchase Order. A Miscellaneous Cash Receipt will be recorded for the refund amount less any restocking or loss amounts. |
| • | Refund Check and Expense: A negative Operating Expense for the desired amount will be created for the Vendor. A Miscellaneous Cash Receipt will be recorded for the refund amount. |
Refund on Credit Card:
| • | Refund on Credit Card and Deposit: A negative Deposit for the desired amount is applied to the Purchase Order. The selected credit card account will have its balance reduced by the recorded amount. |
| • | Refund on Credit Card and Invoice (PO Related): A negative Vendor Invoice for the desired amount is recorded on the Purchase Order. The selected credit card account will have its balance reduced by the recorded amount. |
| • | Refund Check and Expense: A negative Operating Expense for the desired amount will be created for the Vendor. The selected credit card account will have its balance reduced by the recorded amount. |
Credit on Account:
| • | Credit on Account and Deposit: A negative Deposit for the desired amount is recorded on the Purchase Order which can be applied to future purchases from the Vendor. |
| • | Credit on Account and Invoice (PO Related): A negative Vendor Invoice for the desired amount is recorded on the Purchase Order which can be applied to future purchases from the Vendor. |
| • | Credit on Account and Expense: A negative Operating Expense for the desired amount will be created for the Vendor which can be applied to future purchases. |
Creating a Vendor Refund or Return:
First, select the appropriate method of processing the refund or credit in the Credit Type section: Refund Check, Refund on Credit Card, or Credit on Account.
| • | Refund Check: Use this selection to record a refund check from the Vendor. |
| • | Refund on Credit Card: Make this selection if the Vendor has refunded your credit card account. |
| • | Credit on Account: If the Vendor is providing you credit to be applied on future purchases, select this option. |
Next, select the type of transaction for which you are being credited or refunded in the Credit / Refund For section: Deposit on a Purchase Order, Vendor Invoice on a Purchase Order, or an Operating Expense. This selection will adjust the Credit / Refund Information as necessary.
The Credit / Refund Information section has the following fields:
| • | Project: You must input the code of the Project for which you have been refunded or credited. You can search for the Project code by clicking the Search Button. |
| • | Purchase Order Number (PO No.): When recording a credit or refund for a Vendor Deposit or Vendor Invoice, you must input the proper Purchase Order number. You can search for the PO number by clicking the Search Button. |
| • | Vendor: You must input the code of the Vendor for which you have been refunded or credited. The Vendor code may be different from the original Vendor on the Purchase Order if you are being refunded/credited for freight or other miscellaneous charges. You can search for the Vendor code by clicking the Search Button. |
| • | Date: Input the date you wish to have the refund or credit recorded in Design Manager. Depending on the selected Credit Type, this date will be the date of the Miscellaneous Cash Receipt is recorded in the checkbook, the date the credit card refund is reflected in the credit card account, or the date of the credit Vendor Deposit or Vendor Invoice. |
| • | Description: You can optionally input a description of the refund or credit for your future reference. |
| • | Amount: Input the amount of the credit or refund. The amount should always be the actual refund or credit amount from Vendor. In other words, this value will be the amount displayed on the refund check, applied to your credit card account, or the on credit with the Vendor. When using the Invoice (PO Related) or Expense selection under Credit / Refund For, the amount plus any Re-stock Fee/Loss Amount must equal the total of the credit Vendor Invoice or credit Operating Expense described below! |
| • | Re-stock Fee/Loss Amount: If the Vendor is charging any surcharge for restocking or other penalties, enter the amount into this field. Remember, all amounts on this window are entered as positive values! |
After inputting the proper information, click the OK Button to process the credit or refund. Design Manager will always warn you that it will now record the credit or refund at which time you can click the Cancel Button to abort the process, if deemed necessary.
Deposit:
If you are recording a credit or refund for a Vendor Deposit, you're finished! If you received a refund check or adjustment to your credit card account, you will see the refunds in the Checking Window - Checkbook Tab and Checking Window - Credit Cards Tab, respectively.
Invoice:
If you are recording a refund or credit for a Vendor Invoice, you will now have to select the appropriate Components and amounts to refund on the Vendor Deposit, Invoice, or Operating Expense Window.
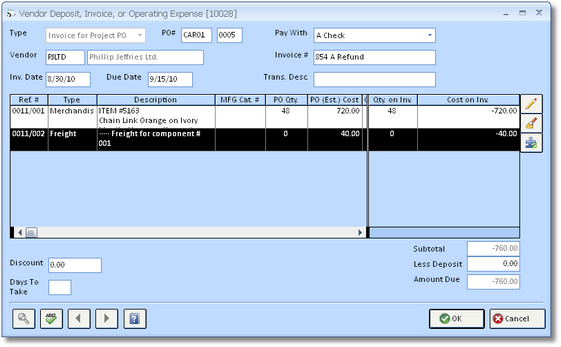
You must change the cost on each Component being refunded by clicking the Edit Button to the right of the Purchase Order Component grid.

On the Vendor Invoice Distribution Window, input the quantity paid for and cost of the Component being refunded in the appropriate fields. Do the same for any freight, installation, etc. if necessary. Be sure to input negative (-) values for the quantity paid for and cost amounts!
After adjusting all the costs properly, the amount due on the Vendor Deposit, Invoice, or Operating Expense must equal the sum of the Amount and Re-stock Fee/Loss Amount fields on the Returns and Credits Window! Click the OK Button when finished.
Expense:
If you are recording a refund or credit for an Operating Expense, you will now have to select the appropriate Expense Account(s) to be refunded on the Vendor Deposit, Invoice, or Operating Expense Window.
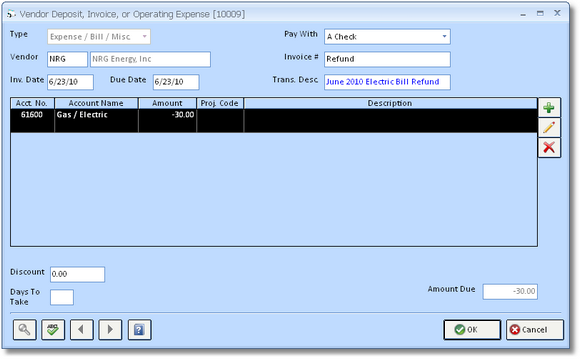
Use the Add Button to the right of the Account Distribution grid to input the proper Expense Accounts and refund amounts on the Vendor Invoice Distribution Window as shown below. Be sure to input negative (-) values for the refund amounts!
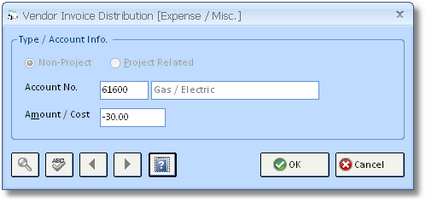
After inputting the refund amounts for the proper Expense Accounts, the amount due on the Vendor Deposit, Invoice, or Operating Expense must equal the sum of the Amount and Re-stock Fee/Loss Amount fields on the Returns and Credits Window! Click the OK Button when finished.
Applying a Credit on Account:
After you have processed a credit using the Credit on Account method, you will eventually apply the credit to a future Deposit or Invoice from the Vendor. Doing so is very simple. A negative Vendor Deposit or Vendor Invoice will remain on the Checking Window - Pay/Print Tab. When you enter another Vendor Deposit or Vendor Invoice for the Vendor that exceeds the credit amount, select both the new Deposit or Invoice and the credit payable together. A single check will generated for Vendor for the Invoice/Deposit less the credit amount.