Start the Data Collection software by choosing Inventory - Remote Data Collection.

You will see a window titled "Data Collection".

This window contains all of the various lots that have been loaded in from the scanner that are waiting to be processed.
This window is used to add new lots, by pressing the Add ![]() button, and to remove existing lots, without processing them, by pressing the Delete
button, and to remove existing lots, without processing them, by pressing the Delete ![]() button. You may also view or continue to work with an existing lot by pressing the Edit Items
button. You may also view or continue to work with an existing lot by pressing the Edit Items ![]() button.
button.
![]() The RGIS Export button - Allows you to Export your Inventory Stock Items as a CSV file. See RGIS Export for more information.
The RGIS Export button - Allows you to Export your Inventory Stock Items as a CSV file. See RGIS Export for more information.
If you have many different types of lots on this list, you can make locating your particular lot a bit easier by selecting that type from the Type box at the very top of this window. If you select a type other than ALL, the computer will display Lots of that specific type only.
To enter a new Lot, press the Add ![]() button.
button.
The Data Collection Items window will appear.
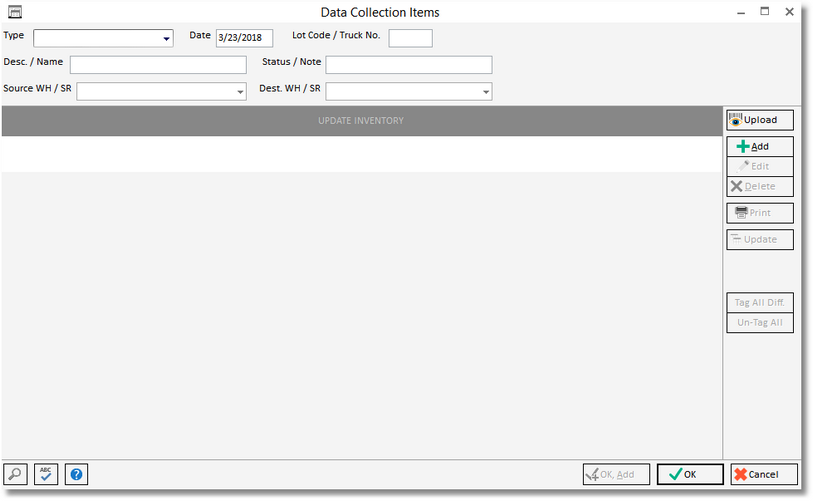
This window will be used to enter the items that make up this Lot. Normally the Lot will be uploaded from your portable scanner. You may also manually add, change or delete items for this Lot via the Add ![]() , Edit
, Edit ![]() , or Delete
, or Delete ![]() buttons on the right-hand side.
buttons on the right-hand side.
| • | To Upload a Lot from the scanner, first put the scanner in the cradle or connect it to the computer via USB cable provided. For help connecting the scanner see: Setting Up the Portable Data Collector. |
| • | Choose a Lot Type from the drop down Type menu. Complete the additional fields that appear for this Lot Type. |
| • | Choose the scanning device that you are using that is already connected to the computer. |
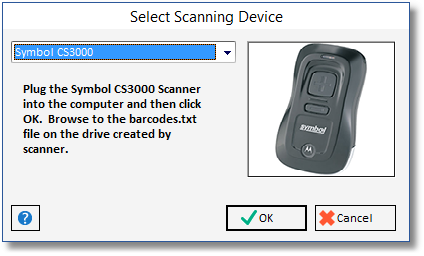
| • | Choose OK. |
If you are using the Symbol CS3000 scanner, you will need to select the Disk Drive it resides on.

In the example above the drive is listed as (F). Select the drive and then Open the Scanned Barcodes folder.
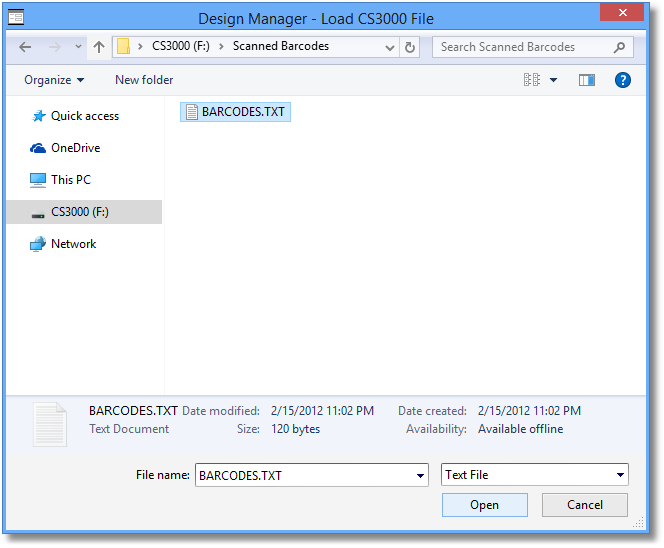
Select and Open the BARCODES.TXT file.
For all other scanning devices, enter the COM Port for your device.

*To find your COM port, minimize the Design Manager program. Go to Computer - (right-click) Select Manage (Computer Management).
Select Device Manager.
Choose the Arrow on Ports. Read the COM port that is next to your Scanner Device. Example: COM7.

Enter the # 7 into the Get Device COM Port window (shown above).
Choose OK to start sending the upload.
| • | You will begin to see the data appear in the white portion of the Data Received window. |
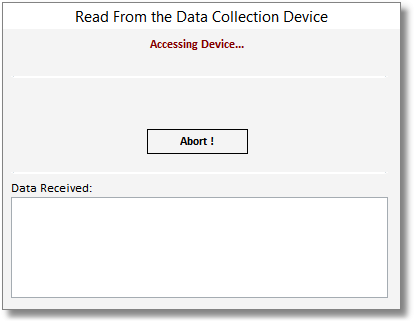
It is important NOT to type on your keyboard during the Accessing Device operation; your typing will be mixed in with the data being transferred from the scanner, which may cause errors!
After the upload completes, the items from the scanner will appear on the list. See Lot Types for more information on the next steps for your chosen Lot Type.