A Project in Design Manager maintains pertinent information for the design work for a Client including the billing, site, and shipping addresses, contact information, project management defaults, etc. Specifications, Purchase Order, Proposals, etc. are all assigned and organized by specific Projects in Design Manager.
To create a new Project in Design Manager, click on the Projects and Specifications Button  on the Tool Bar . This will open the Projects and Specifications Window pictured below.

Next, click on the New Project button to open the Project Window.
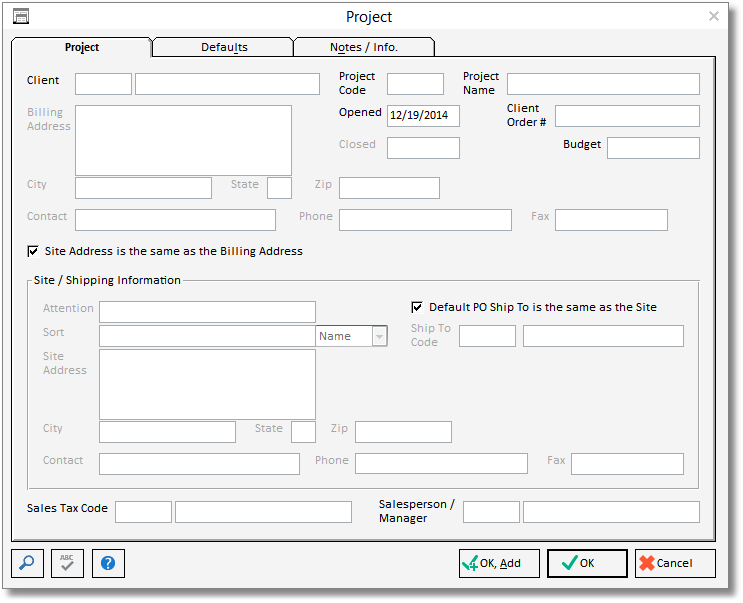
On the Project Tab of the Project Window, first select or input the proper Client Code for the Project. With the cursor in the Client Code field, you can click on the Search button ![]() , or press the Alt-S keys on the keyboard, to use the Client Search Window to locate the desired Client Code. The Client Search Window can also be used to create a new Client. For more information, see Creating a New Client. When the Client Code is entered, the Client Name, Billing and Site Address, Contact, Phone, Fax, and Salesperson/Manager will all default from the information in the Client Glossary. You can edit any of this information as needed. Note the Billing Address and will be used on Proposals and Invoices generated for this Project.
, or press the Alt-S keys on the keyboard, to use the Client Search Window to locate the desired Client Code. The Client Search Window can also be used to create a new Client. For more information, see Creating a New Client. When the Client Code is entered, the Client Name, Billing and Site Address, Contact, Phone, Fax, and Salesperson/Manager will all default from the information in the Client Glossary. You can edit any of this information as needed. Note the Billing Address and will be used on Proposals and Invoices generated for this Project.
You'll notice that a Project Code has automatically been created based upon the Client Code and how many Projects already exist for the Client. You can, however, use any unique Project Code of up to 5 alphanumeric characters. Utilizing Project Codes that are easy to remember is good practice, as the Code will be used throughout Design Manager whenever a reference is made to the Project.
Next, enter the Project Name into the corresponding field. The Name should be something descriptive of the job such as "Main Residence" or "Summer Home". Normally it is not the Client’s name as Client's can have multiple Projects which would lead to confusion.
Client Order #: The Client Order Number is an optional field used to enter an order number given to you by a Client. If the Client is a hospital or other institution, they may ask you to record their Purchase Order number on any correspondence sent to them. Use this field to record that number as it will print on any Proposals and Invoices for this Project. Again, this field is optional and may be left blank. The Client Order Number can be up to 16 characters.
Budget: An optional field for you to enter the Project's overall budget amount. This number will appear on the Budget Report.
If the Project Site Address is different than the Billing Address, select the uncheck the Site Address is same as the Billing Address option and input the proper Site Address information. The Site Address can be optionally printed on Proposals and Client Invoices as desired.
The Project Ship To Code is used to select the default shipping address for Purchase Orders generated for the Project. When specifying Components for the Project, Design Manager will use the Ship To Code specified on this tab. The Ship To Code can, of course, be changed on the Component Window as necessary. When creating a new Project, the Default PO Ship To is the same as the Site option is selected indicating a Ship To Code, with the same Code as the Project, representing the Site Address will automatically be created. If a different default merchandise shipping location is necessary for the Project uncheck the Default PO Ship To is the same as the Site option, click the Search button to select a Ship To Code from the Ship To Search Window or to create a new Ship To Code. For more information, see Ship To Code Glossary Window under Glossary Windows.
Next you will need to fill in a Sales Tax Code. This Code tells Design Manager how to charge sales tax for the Project. To search for a Sales Tax Code, or to create a new Sales Tax Code, place the cursor into this field and click on the Search button in the lower left corner of the window. For a complete description on Sales Tax Codes, see the Sales Tax Code Window.
Finally, the Salesperson / Manager can optionally be used to designate the individual responsible for overseeing the Project. You can use the Search button to select a Salesperson / Manager from the Employee / Manager / Salesperson Search Window or create a new Salesperson / Manager. For more information, see Employees / Managers / Sales People Glossary Window under Glossary Windows.
The Project Defaults Tab can be used to configure additional settings for the Project.
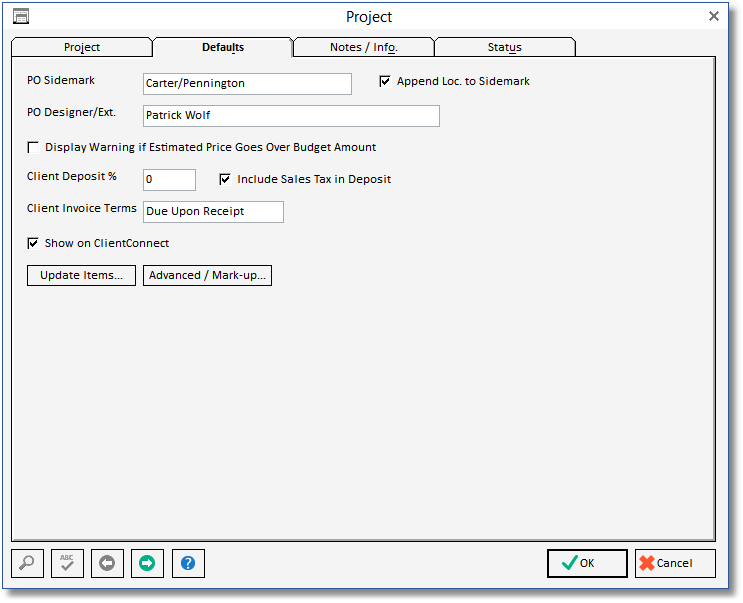
The Sidemark will be defaulted to all Components created for the Project and will print on all Purchase Orders generated for those Components. The Append Location To Sidemark (Append Loc. to Sidemark) option will add the Item Location to the Sidemark of each Component. As with other defaults, you can override these setting for individual specifications.
The Designer/Extension (Designer/Ext.) is used for the designer or project manager to enter their name and direct phone number and will print on the Purchase Order to assist the Vendor in contacting the appropriate individual in the company.
The Client Invoice Terms will print on all Client Invoices for the Project indicating the payment terms required upon invoicing.
For Details on the remaining fields pictured above, please see the Project Defaults Tab section.
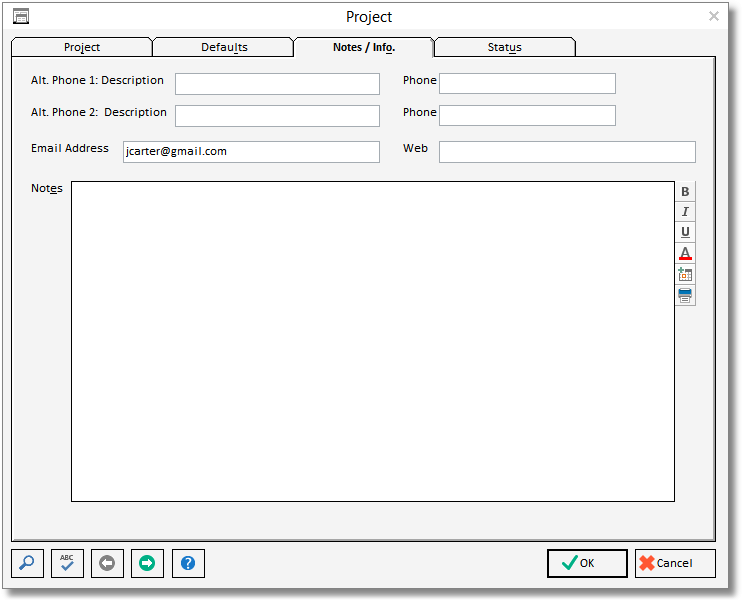
The Project Notes/Information Tab is for additional contact information and phone numbers, e-mail and website address, and any additional information pertaining to the Project.
For a full explanation of all the fields, options, and other functions on the Project Window, see the Project Window.