The second tab on the New Invoice Window is the Options Tab. This tab shows all of the Items within a Project in a tree structure similar to the Specifications Window - Tree View Tab. It also provides access to the Project Advanced Options Window – Invoice Tab where you may change defaults for how Invoices will print for a Project.
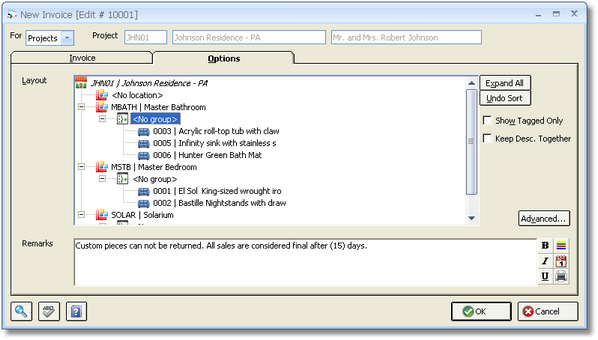
Layout: The Layout displays the Project hierarchy from the Specifications Window - Tree View Tab and allows you to edit the order that Locations, Groups, and Items appear on a printed Proposal. By default, the Items will be in Location Code order, followed by their Group, then with each Item in Reference Number order within its Group. To change the order, you can select and drag an Item, Group, or Location to the desired position. Locations can be arranged in any order. Items can be arranged in any order but only in their respective Group and Location. If you want to move the Item to another Location or Group, click the Edit Item button on the Invoice Tab and change the Location or Group as necessary. Note: Groups will only be displayed if the Item Groups option on the Company Advanced Options Window - General Tab is selected
Expand All: This button can be used to open each Location and Group within the Project to display all of the Items for rearranging in the layout area.
Undo Sort: This button will close all of the layout branches and puts the Items, Groups, and Locations in default order (i.e., Location Code, Group, then Item Reference Number order). Please note that all prior changes to the sort order of the Items, Groups, and Locations will be lost!
Show Tagged Only Check Box: Selecting this option causes the layout to only show Items you have currently tagged on the Invoice Tab.
Keep Description Together (Keep Desc. Together): This option is defaulted from the Company Advanced Options Window - Print Tab and determines whether or not Design Manager will split the Description of an Item over multiple pages of the Client Invoice. If Keep Description Together is selected, an Item will begin on a new page if it is determined that the Description would span over two pages. If the option is not selected, the Description will print to the bottom of the current page then continue on the subsequent page. The option is set for each Item individually to allow further flexibility in the appearance of the printed Client Invoice. Simply select the desired Item on the Layout Tree and set the option as desired.
Advanced Button: Clicking on this button will open the Project Advanced Options Window – Invoice Tab where printing defaults can be set for how Invoices will print for a Project. For a full description of the Client Invoice options, see the Project Advanced Options Window - Invoice Tab.
Remarks: This optional field can hold Remarks that will print on the bottom of the Invoice. To view a Glossary of frequently used Remarks, click on the Search button when the cursor is in the Remarks field. The text will default from the Remarks on the Project Advanced Options – Invoice Tab but can edited as desired.